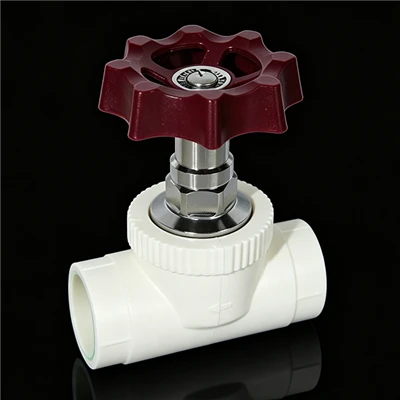
Installation quality determines sealing performance and service life. The three core elements: correct flow direction, standardized heat fusion, and proper pressure testing.

I. Pre-Installation Inspection
• Specifications & Appearance: Verify nominal size and pressure rating match the PPR piping; check valve body for cracks or deformation, ensure handwheel turns smoothly and stem moves up and down without sticking.
• Flow Direction Confirmation: Valve body is marked with a flow direction arrow. Follow the "low in, high out" principle, aligning the arrow with the water flow. Reverse installation causes incomplete closure and damages the valve disc/sealing surface.
• Working Conditions: Heat fusion temperature calibrated to 260°C±10°C; ambient temperature ≥5°C. If below 5°C, take heating measures or work indoors.
II. Heat Fusion Connection
• Heating Time: 20mm (5s), 25mm (7s), 32mm (8s), 40mm (12s), 50mm (18s), 63mm (24s). Insufficient time causes weak fusion; excessive time causes material buildup and diameter reduction.
• Insertion: After heating, insert vertically and steadily into the socket to the marked depth. No rotation or tilting. Hold still for several seconds after insertion.
• Cooling: 20-25mm approx. 2 min, 32-40mm approx. 4 min, 50-63mm approx. 6-8 min. Do not twist the pipe or valve during cooling.
III. Hydrostatic Pressure Test
• Pressure Standard: Cold water: 1.5× working pressure, minimum 0.9MPa. Hot water: 2.0× working pressure, minimum 1.2MPa. Valve is tested together with the piping system; never apply excessive pressure to the valve alone.
• Stabilization & Acceptance: After reaching specified pressure, stabilize for 1 hour (60 min). Pressure drop ≤0.05MPa. Inspect valve body, fusion joints, and stem gland for leakage or deformation.
• Post-Test: Release pressure slowly, fully open the valve to flush residual debris. For concealed work, keep pressure test records and photos before sealing walls or ceilings.
IV. Common Pitfalls
1. Reverse Flow Direction: Always check the arrow. Inlet corresponds to arrow tail, outlet to arrow head. Never install by guesswork.
2. Weak Fusion: Control temperature and timing; keep insertion coaxial and avoid tilting.
3. Stem Leakage: Tighten the gland nut before testing. If leakage occurs during operation, replace the stem seals after depressurizing - no need to replace the entire valve.
V. Core Acceptance Tips
Installation quality hinges on three key points: correct flow direction, standardized heat fusion, and proper pressure testing. Correct direction ensures regulation and sealing; proper fusion eliminates joint leakage; passing the pressure test verifies overall reliability. Strict adherence to process standards maximizes the flow regulation advantages of the PPR stop valve, reduces long-term leakage and failure risks, and ensures stable operation of the entire water supply system.