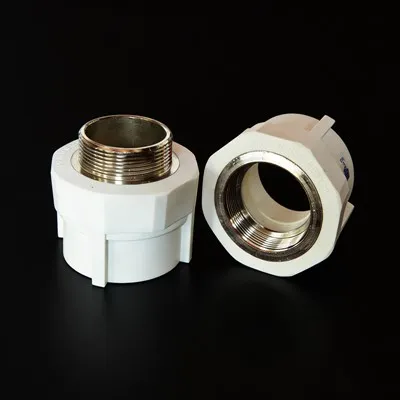
Hey there! As a supplier of Plastic PPR Pipe Fittings, I've seen my fair share of installation projects, and I know how crucial it is to get the installation right. In this blog, I'm gonna share some important installation precautions for plastic PPR pipe fittings.
1. Preparation Before Installation
First things first, you gotta make sure you've got all the right tools and materials. You'll need a pipe cutter, a soldering iron or a hot - melt welding machine, and of course, the PPR pipe fittings themselves. Check the fittings for any visible damage like cracks or scratches. If you find any, don't use them. It's better to replace them right away to avoid future problems.
Also, measure the pipes accurately. Cut the pipes to the correct length using a pipe cutter. Make sure the cut is straight and clean. A jagged cut can lead to a poor connection between the pipe and the fitting.
2. Cleaning the Pipes and Fittings
Cleanliness is super important when it comes to installing PPR pipe fittings. Any dirt, dust, or grease on the pipes or fittings can prevent a proper bond. Use a clean cloth to wipe down the pipes and fittings before installation. If there's stubborn dirt, you can use a mild detergent, but make sure to rinse it off thoroughly and dry the surfaces completely.
3. Welding Process
The welding process is the heart of PPR pipe fitting installation. When using a hot - melt welding machine, pre - heat it to the right temperature. Usually, the recommended temperature for PPR pipes is around 260°C.
Insert the pipe into the welding machine's heating sleeve and the fitting onto the heating mandrel at the same time. Keep them there for the specified time, which is usually a few seconds depending on the pipe diameter. For example, for a 20mm pipe, it might be around 5 - 6 seconds.
After the heating time is up, quickly and smoothly insert the pipe into the fitting. Don't rotate or move the pipe during this process. Hold them in place for a few seconds until the plastic cools and solidifies. This ensures a strong and leak - proof connection.
4. Installation of Specific Fittings
PPR Elbow Joint
The PPR Elbow Joint is used to change the direction of the pipe. When installing it, make sure the angle is correct. If the elbow is not installed at the right angle, it can cause problems with the flow of water or other fluids in the pipes. Also, follow the same welding process as mentioned above to ensure a good connection.
Plastic PPR Male Tee
The Plastic PPR Male Tee is used to connect three pipes together. When installing it, make sure all the connections are straight and aligned. If one of the connections is off - center, it can lead to uneven pressure distribution in the pipes, which might cause leaks or other issues in the long run.


PPR Stop Valves
PPR Stop Valves are used to control the flow of fluid in the pipes. When installing them, make sure they are installed in the correct orientation. The valve should be easy to access for future maintenance or operation. Also, check the valve for proper sealing before and after installation.
5. Pressure Testing
After the installation is complete, it's essential to conduct a pressure test. This helps to identify any leaks in the system. Close all the outlets and fill the pipes with water. Then, use a pressure gauge to increase the pressure to a level higher than the normal operating pressure. Keep the pressure stable for a certain period, usually around 15 - 30 minutes.
If there are any leaks, you'll notice a drop in pressure. Mark the leaky areas and repair them. Once the repairs are done, repeat the pressure test until there are no more leaks.
6. Avoiding External Damage
During and after installation, take steps to protect the PPR pipes and fittings from external damage. Avoid placing heavy objects on the pipes. If the pipes are installed outdoors, protect them from direct sunlight as prolonged exposure to UV rays can cause the plastic to degrade over time. You can use pipe insulation or covers to shield them.
7. Temperature Considerations
PPR pipes and fittings are sensitive to temperature changes. In cold weather, the plastic becomes more brittle. So, if you're installing in cold conditions, take extra care. You might need to warm up the pipes and fittings slightly before welding to ensure a good bond.
On the other hand, in hot weather, the pipes can expand. Make sure to leave some room for expansion in the installation. Otherwise, the pipes might buckle or break under the stress.
8. Professional Installation
While it's possible to install PPR pipe fittings on your own, it's always a good idea to hire a professional if you're not experienced. A professional installer knows all the ins and outs of the installation process and can ensure that everything is done correctly.
If you're in the market for high - quality Plastic PPR Pipe Fittings, we've got you covered. Our products are made from top - notch materials and are designed to meet the highest standards. Whether you're working on a small DIY project or a large - scale construction job, we have the right fittings for you.
If you're interested in purchasing our Plastic PPR Pipe Fittings, feel free to reach out to us for a quote. We're always happy to discuss your specific needs and help you find the best solutions for your project. Let's work together to make your plumbing installation a success!
References
- "Plastic Pipes Handbook" by W. B. Young
- "PPR Pipe Installation Guide" published by industry experts